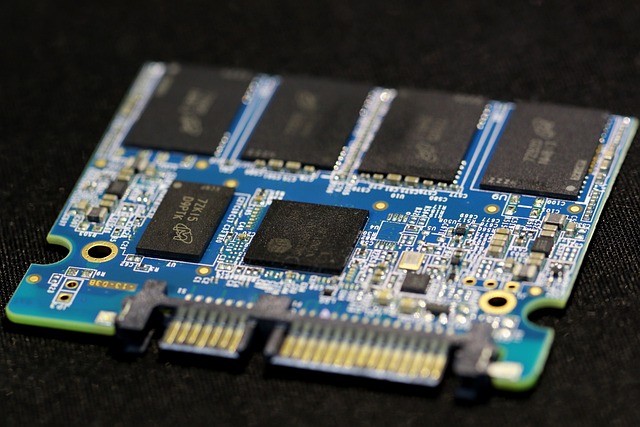
In this blog post, we’ll walk you through the steps involved to install an SSD in your PC. We’ll discuss different types of SSDs and the steps involved in installing each type. We’ll also provide recommendations for choosing the right SSD for your needs.
Solid-state drives (SSDs) are becoming increasingly popular as a storage option for computers. They offer a number of advantages over traditional hard disk drives (HDDs), including faster boot times, improved application performance, and lower power consumption. If you’re considering upgrading your computer to an SSD, you’ll be happy to know that it’s a relatively simple process.
Types of SSDs
There are two main types of SSDs: SATA and NVMe.
- SATA SSDs are the most common type of SSD. They use the same SATA interface as traditional HDDs, so they’re compatible with most PCs.
- NVMe SSDs are a newer type of SSD that uses the PCI Express (PCIe) interface. NVMe SSDs can offer significantly faster speeds than SATA SSDs, but they’re also more expensive.
Choosing the Right SSD
When choosing an SSD, there are a few things to consider:
- Capacity: SSDs come in a variety of capacities, ranging from 128GB to several terabytes. The amount of storage you’ll need will depend on your individual needs. If you only use your computer for basic tasks such as browsing the web and checking email, a 256GB SSD may be sufficient. However, if you store a lot of photos, videos, or games, you’ll need a larger SSD.
- Performance: NVMe SSDs offer the best performance, but they’re also the most expensive. SATA SSDs are a good balance of performance and price.
- Brand: There are many different brands of SSDs on the market. It’s important to choose a reputable brand that offers a warranty on its products.
Before You Begin
Before you begin to install an SSD in your PC, there are a few things you’ll need to do:
- Back up your data: This is the most important step. Before you start messing around with your computer’s hardware, it’s important to back up all of your important data.
- Gather your tools: You’ll need a screwdriver to open your computer case. You may also need a SATA cable and mounting screws for your SSD, depending on your computer.
- Find your computer’s manual: Your computer’s manual will have instructions on how to open the case and install new hardware.
Installing a SATA SSD
Here are the steps involved to install an SSD in your PC:
- Shut down your computer and unplug all of the cables.
- Open your computer case. Consult your computer’s manual for instructions on how to do this.
- Find a free SATA data port and a free SATA power connector on your motherboard.
- Mount your SSD in a free drive bay. Most computer cases have screws that you can use to mount your SSD.
- Connect the SATA data cable to your SSD and your motherboard.
- Connect the SATA power cable to your SSD and your power supply.
- Close your computer case and reconnect all of the cables.
- Boot up your computer.
Installing an NVMe SSD
Here are the steps involved in installing an NVMe SSD:
- Shut down your computer and unplug all of the cables.
- Open your computer case. Consult your computer’s manual for instructions on how to do this.
- Find an empty PCI Express (PCIe) slot on your motherboard. NVMe SSDs typically use PCIe x4 slots.
- Insert your NVMe SSD into the PCIe slot.
- Secure the SSD with the screw that came with the PCIe slot.
- Close your computer case and reconnect all of the cables.
- Boot up your computer.
Read Also : Huawei OceanStor Dorado: Next-Gen All-Flash Storage for AI Workloads
Formatting Your SSD
Once you’ve installed your SSD, you’ll need to format it before you can use it. You can format your SSD using the Windows Disk Management utility.
- Open the Start menu and search for “Disk Management”.
- In the Disk Management window, you should see your new SSD listed.
- Right-click on the SSD and select “Initialize Disk”.
- In the Initialize Disk window, select GPT for the partition style and click OK.
- Right-click on the unallocated space on the SSD and select “New Simple Volume”.
- Follow the on-screen instructions
- Choose a letter for your new volume and click Next.
- Select the desired file system (usually NTFS) and click Next.
- Assign a label to your new volume and click Next.
- Click Finish to complete the formatting process.
Installing an Operating System (Optional):
If you’re installing a new operating system on your SSD, follow the installation instructions provided by your operating system. You’ll typically need to create a bootable USB drive or DVD with the operating system installation files and boot your computer from it.
Additional Considerations:
Cloning Your Existing Hard Drive: If you want to transfer all of your data and settings from your old hard drive to your new SSD, you can use cloning software.
Driver Updates: After installing your SSD, it’s important to install any necessary driver updates from your motherboard manufacturer.
SSD Optimization: Some operating systems have built-in features that can help optimize your SSD’s performance. Be sure to check your operating system’s documentation for more information.
Conclusion:
Installing an SSD is a relatively simple process that can significantly improve your computer’s performance. By following the steps outlined in this guide, you should be able to install your SSD without any problems.

This Post Has 0 Comments